VT102 User Guide
Chapter 6
Contents
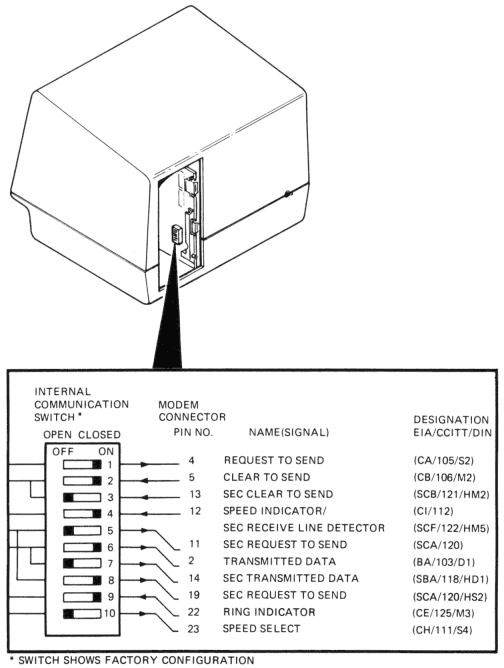
Figure 6-3 Communication Switch Summary
Chapter 6
Contents
http://vt100.net/docs/vt102-ug/figure6-3.html